Explore and Explain
Activity 1: How Does a Plant Grow?
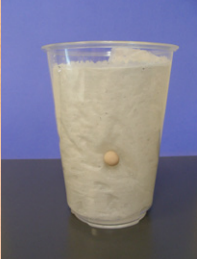
- Inform the students that they will be looking at the growth of pea seeds over the next few days. Model for the students how to set up the pea seeds in a cup with a paper towel and water. Note: This set up will need to be done several days before students begin with Activity 2.
- Write your name near the top of the cup using a permanent marker.
- Fold the paper towel and place it into the clear plastic cup so that it lies against the walls of the cup and does not extend above the rim of the cup.
- Use a spray bottle to moisten the paper towel.
- Insert 2-3 pea seeds between the paper towel and the wall of the cup. The seeds should be placed evenly around the cup and about 1/3 of the way from the bottom of the cup.
- Add water to the cup. The seeds should not be submerged in water—the paper towel will wick water to keep the seeds moist.
- Add water periodically so that the paper towel and seeds do not dry out.
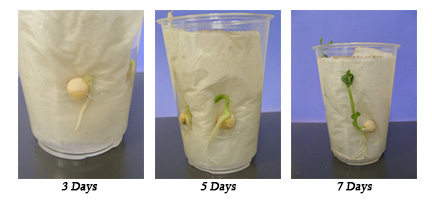
- For the next few days, allow a few minutes for students to observe their pea seeds.
- After students begin to observe changes or growth in their seeds, ask students to share their observations. Record the observations on the board or chart paper. Continue to add to this list for a few days. Observations may include:
- The seed swells or gets larger
- The root grows downward
- Branching of the root system
- A green stem growing upward
- Small leaves on the stem
Activity 2: From Soil to Roots
- Ask the students, “Why do plants need water from the soil?” Follow this with the question, “Is there anything else in the water that the plant needs?”
- Introduce the word “nutrients” to the students. Nutrients are substances that plants and animals need to be healthy. Nutrients cannot be seen, but are important for health. The nutrients plants need are released from soil particles into soil water.
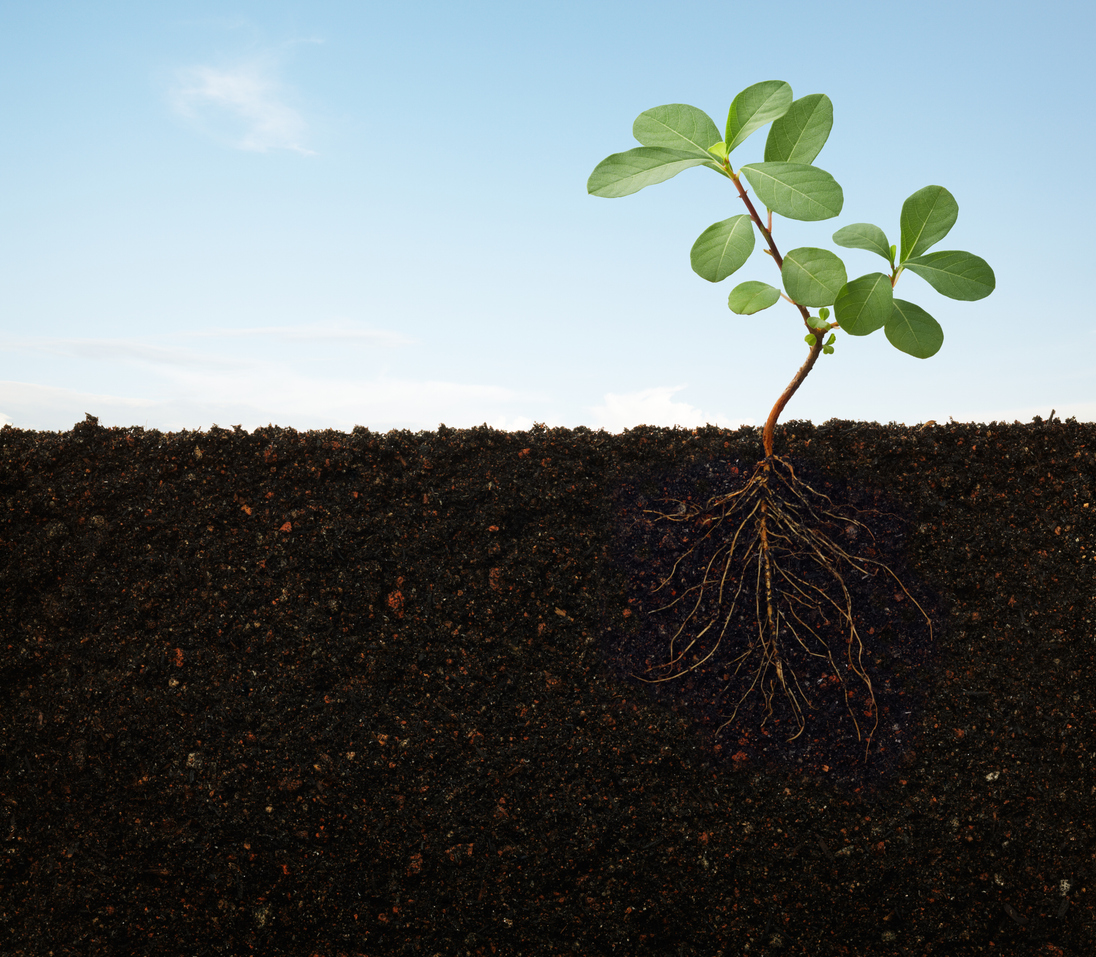
- Continue the discussion by asking students how plants get their nutrients, "What parts of the plant are important for getting nutrients from the soil?" (roots)
- Explain to the students that they will be examining the roots of a plant. Divide the students into groups of four. Pass out a young seedling (taken from the paper towel germination in Activity 1) and a hand lens to each group. Tell the students that they should look at the roots of the seedling first using just their eyes and then using the hand lens. Ask the students to draw a picture of the roots of their seedling. Note: When students look at the roots with just their eyes, they may see just a basic root structure. When they use the hand lens, they are likely to notice small, fine projections coming off the roots. These are the root hairs. The root hairs are white and very fine. It may be easier to see the root hairs if students put a dark background behind the roots.
- After the students have drawn pictures to represent their observations, ask for volunteers to describe what they saw. Students can also compare their observations with the seedlings from Activity 1.
- Ask students, “Why do you think plants have so many root branches and root hairs?” (More root hairs allow for more area with which to contact water and nutrients in the soil.)
- Ask students, “How do nutrients in the soil water get into the root hairs?”
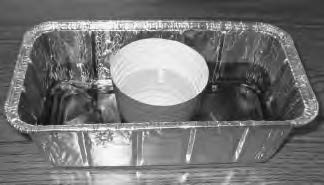
- Explain to the students that you are going to demonstrate the process by which water enters the roots. As you lead the demonstration, explain that the cup represents the root, the water inside the cup represents the water inside the root, the water in the larger container represents the water in the soil, and the food coloring represents the nutrients dissolved in the water.
- Step 1: Fill the cup about half full of water.
- Step 2: Place the cup of water into the center of the larger container.
- Step 3: Fill the larger container with water until its level is the same as that in the cup.
- Step 4: Add several drops of food coloring to the water in the larger container and gently mix the water until the color is evenly distributed through the water. Do not add food coloring to the water in the cup!
- Step 5: Using a sharp pencil, poke two small holes in the cup opposite each other.
- Step 6: Watch the water in the cup for up to five minutes.
- Ask the students to share their observations from the demonstration.
- Ask the students, "How is the demonstration similar to what happens in the roots of plants?" (The demonstration is a model of how water and nutrients move from outside the root to inside the root.)
Activity 3: From Roots to the Plant
- Ask the students, “Besides the roots, do other plant parts need water and nutrients?” followed by “How do water and nutrients get from the roots to the rest of the plant?”
- Explain to the students that they are going to investigate how water moves from the roots to the rest of the plant. Ask the students to work in their groups of four from Activity 2.
- Pass out a copy of Master 3.1 to each student. Read through the instructions with the students to ensure that they understand their task.
- Ask the students to write their predictions about what will happen with the food coloring, water, and celery.
- As the students work on their investigation, circulate among the groups to answer questions and help them with timing the investigation.
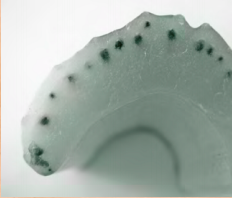
- Reconvene the class and ask for volunteers to report their predictions and results about the movement of the food coloring in the celery. Ask them if their predictions were correct or incorrect. Ask them what conclusions they can make about the movement of water and nutrients in plants. (The food coloring was transported up the celery stalk and was visible as a series of colored dots along the top of the stalk.)