Students may be familiar with recycling tin cans and plastic bottles so that the materials can be used again and again, but do they realize that recycling happens in natural systems as well? By bringing vermicomposting into your classroom, students can observe how ordinary creatures like worms become super recyclers, turning kitchen scraps into compost that can help living plants grow and thrive.
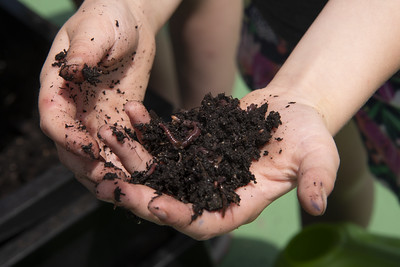
Worms live in soil all over the world. They help change bits of dead plants and animals back into nutrients that plants can use. Students may be interested to learn that worms recycle by eating dead organic matter and then turning it into castings—also known as worm poop—that are nutrient rich and useful to plants. Worms also help aerate and loosen the soil so that plants’ roots can more easily develop underground. For these reasons, worms are an integral part of a healthy ecosystem.
Although a farm may not be the first thing you think of when you hear the word ecosystem, farms are natural systems with living and nonliving components that affect each other. Healthy soil is the foundation of a productive farm. Pretty much everything we eat comes from the soil. Fruits, vegetables, and grains come from plants that grow in the soil, and dairy and meat products come from animals that eat plants that grow in the soil. So, worms are not only important for composting food scraps, they can also play a role in making healthy soils to grow food for us to eat.
Vermicomposting is a great way for students to observe the effect worms have in a miniature ecosystem. There are many different types of worms, but red wigglers (readily available online) are best suited for indoor vermicomposting. To begin, set up a worm bin according to the included instructions or in the way that will best suit your classroom needs. There are many different ways to build a successful worm bin. For alternative instructions, see the Classroom Vermicomposting Resources at the end of the Procedures section of this lesson.
Once the bin is set up, assign one or two students a week to give food scraps to the worms. Worm bins do poorly with food scraps that are fatty or contain meats, but work well with newspaper, vegetables, coffee grounds and even eggshells. Although worms eat a lot for their size, they need only a couple small handfuls of food a week. As the worm population grows, they should be able to eat more food. Make sure the food scraps are buried—this will prevent bad food odors. Keep a spray bottle available so that students can add water when feeding the worms if the bin seems too dry.
Maintaining a worm bin is easy, but be sure to keep the following things in mind as you tend to the worms:
- Too much moisture will cause molds and other unwanted pests to grow, which will prevent the worms from doing their job. If condensation is forming inside the bin, simply remove the lid to let the bin air out for a couple of hours and then add more holes for drainage and ventilation.
- The worms will have a hard time surviving if the compost is too dry. The bedding material should be moist to the touch without forming droplets when squeezed. If there is not enough moisture, simply use a spray bottle to add one or two tablespoons of water at a time until the bin is at the right moisture level. If lack of moisture continues to be a problem, consider closing off some ventilation holes with tape.
- If the worms are given too much food, the bin may start to stink as bacteria and other microorganisms break down the food before the worms can. If this becomes a problem, it may be a good idea to remove some of the excess food and monitor how fast the worms are eating the food that is added.
- Typically, room temperature is great for worms, but be cautious that they do not get too hot or too cold, as either situation could stun and possibly kill the worms.
After a few months, the compost can be harvested. Open the bin, and shine a bright light onto the soil. The worms will migrate to a deeper level away from the light, and the top layer of compost can be scraped away for later use. Continue this process until you get close to the bottom of the bin and mostly worms remain. Then add fresh bedding and soil to the bin to give the worms a new home again. The compost that is scraped away makes a wonderful soil amendment for garden and indoor plants.

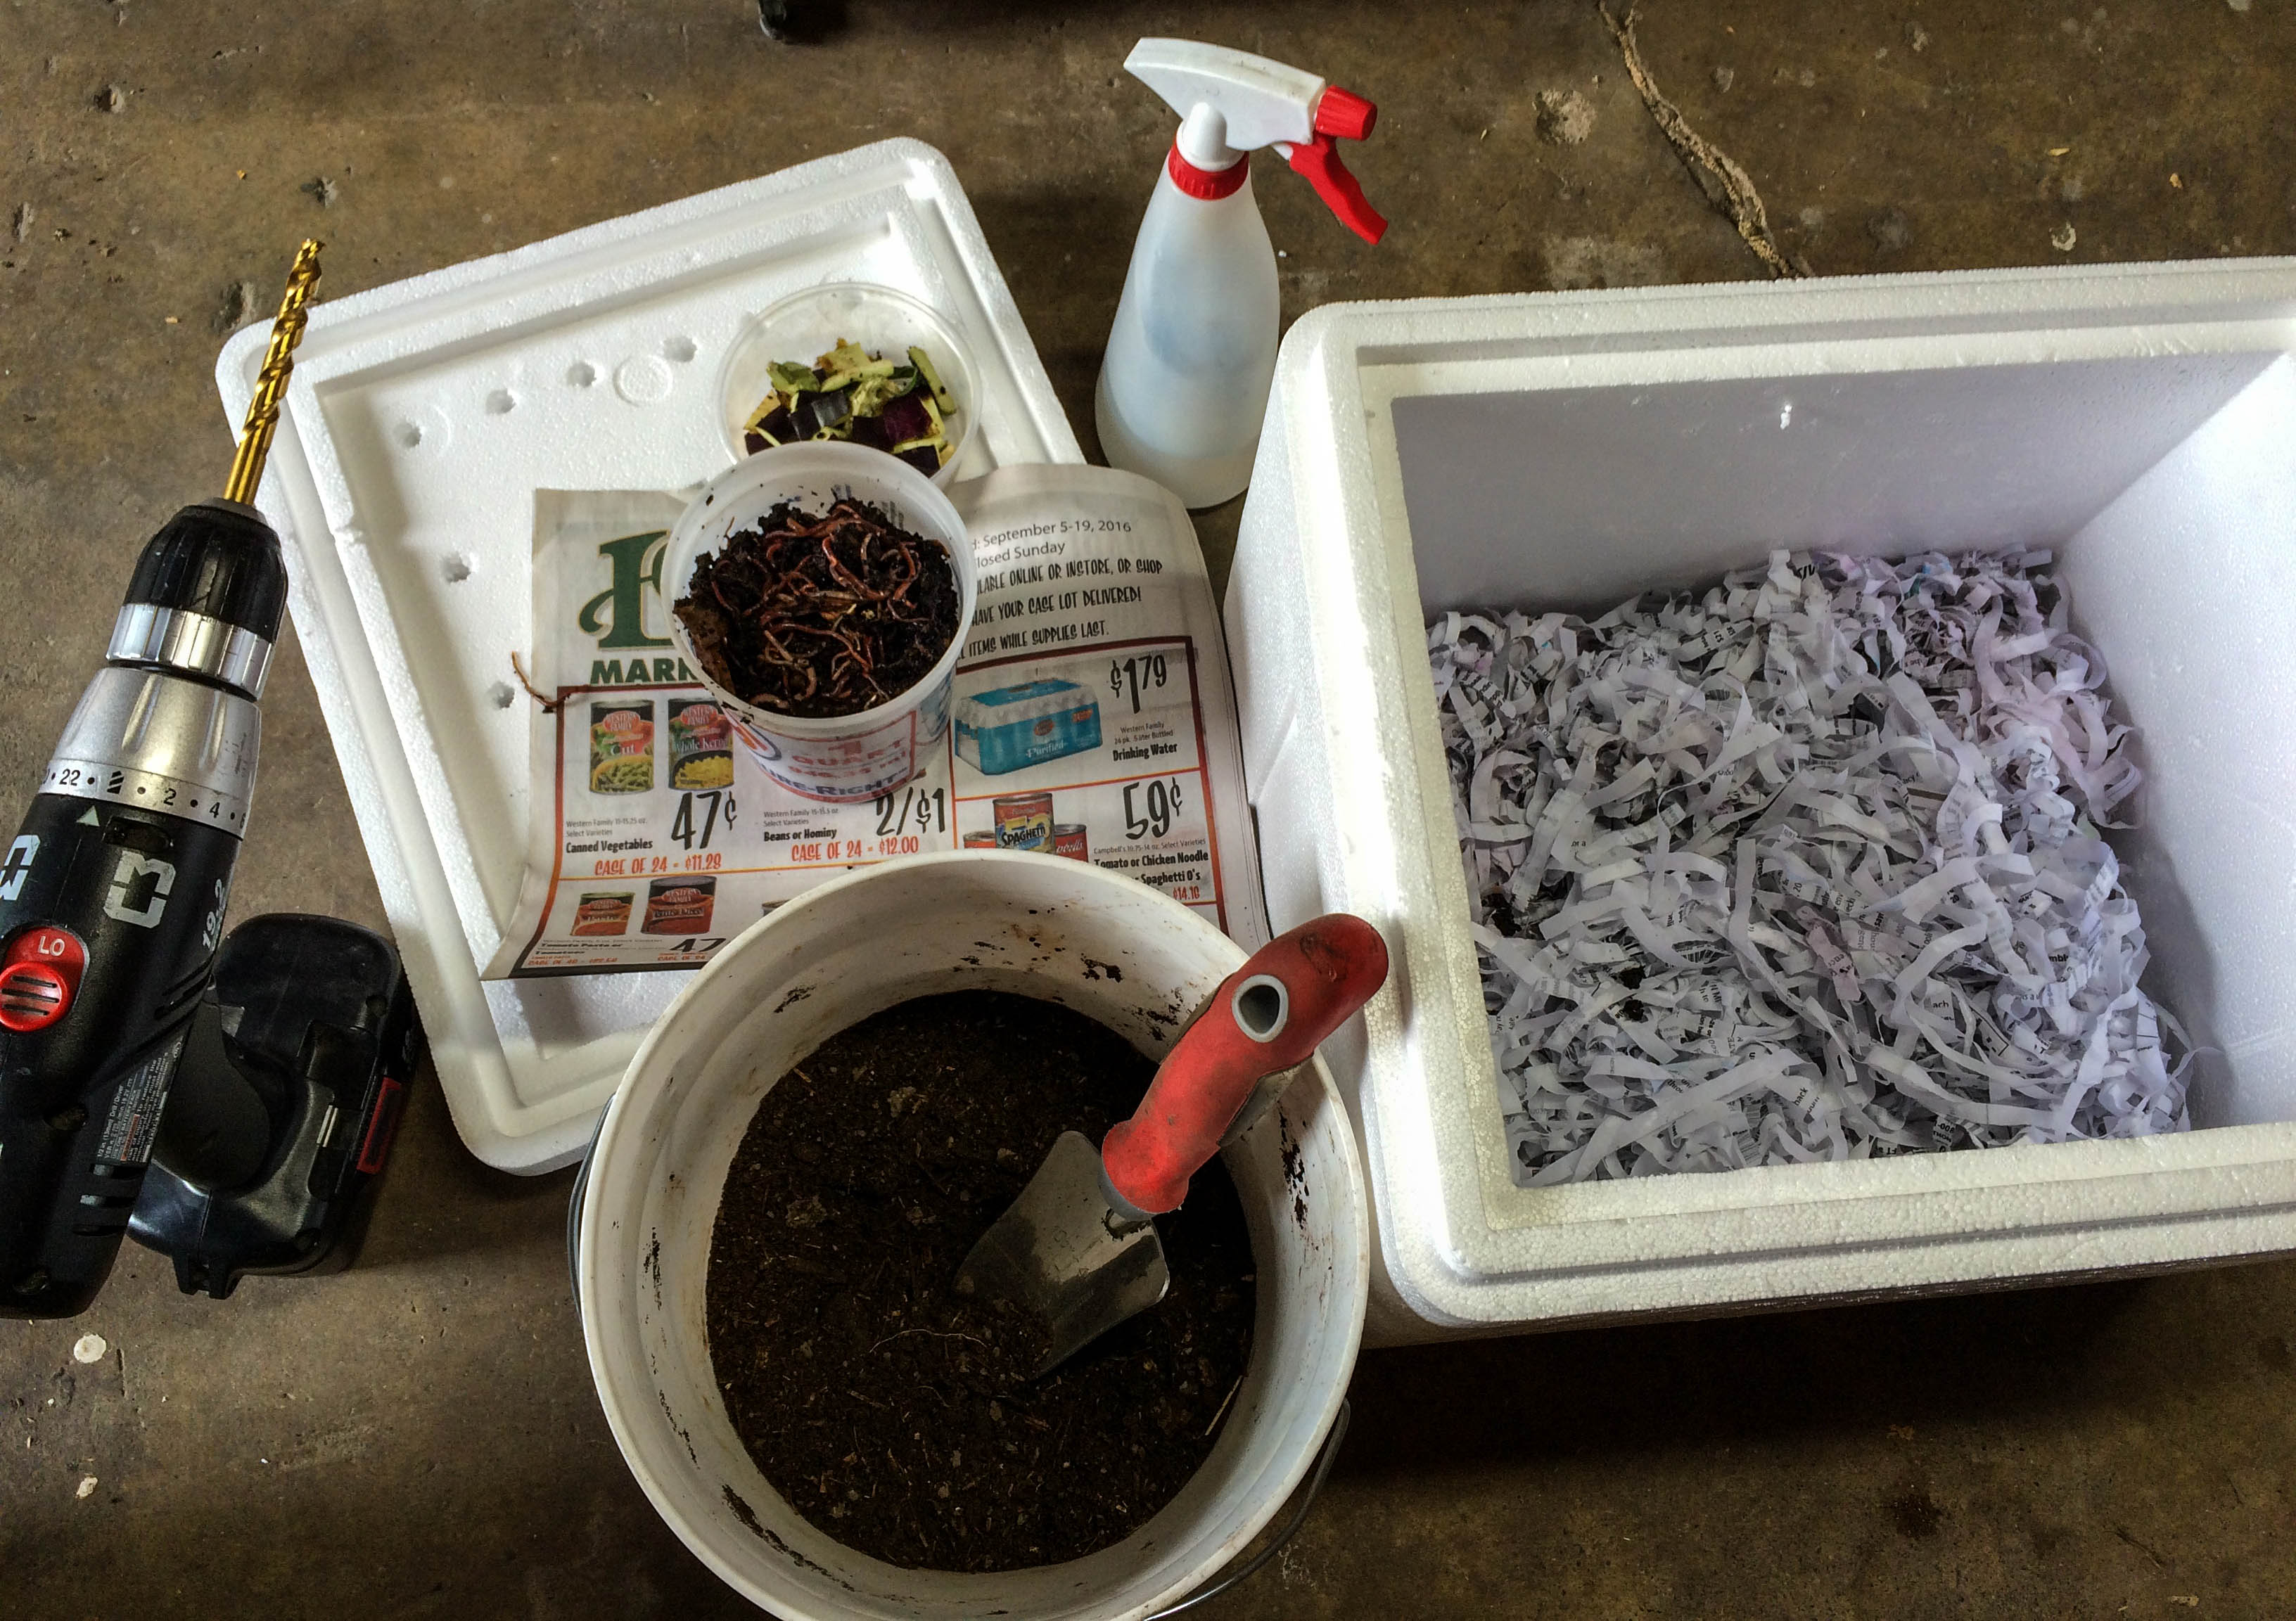 cooler lid. Have a vacuum cleaner handy—this can be messy!